We've redesigned the MCP configurator with a refreshed Apify brand identity and a simpler setup flow, making it easier to connect Apify to any LLM and use Actors in agentic workflows — so you can get your agents up and running faster.
Supported clients
Set up the Apify MCP server in a few clicks from Claude Desktop, Claude.ai, Claude Code, Antigravity, Cursor, ChatGPT, Codex, VS Code, and more.
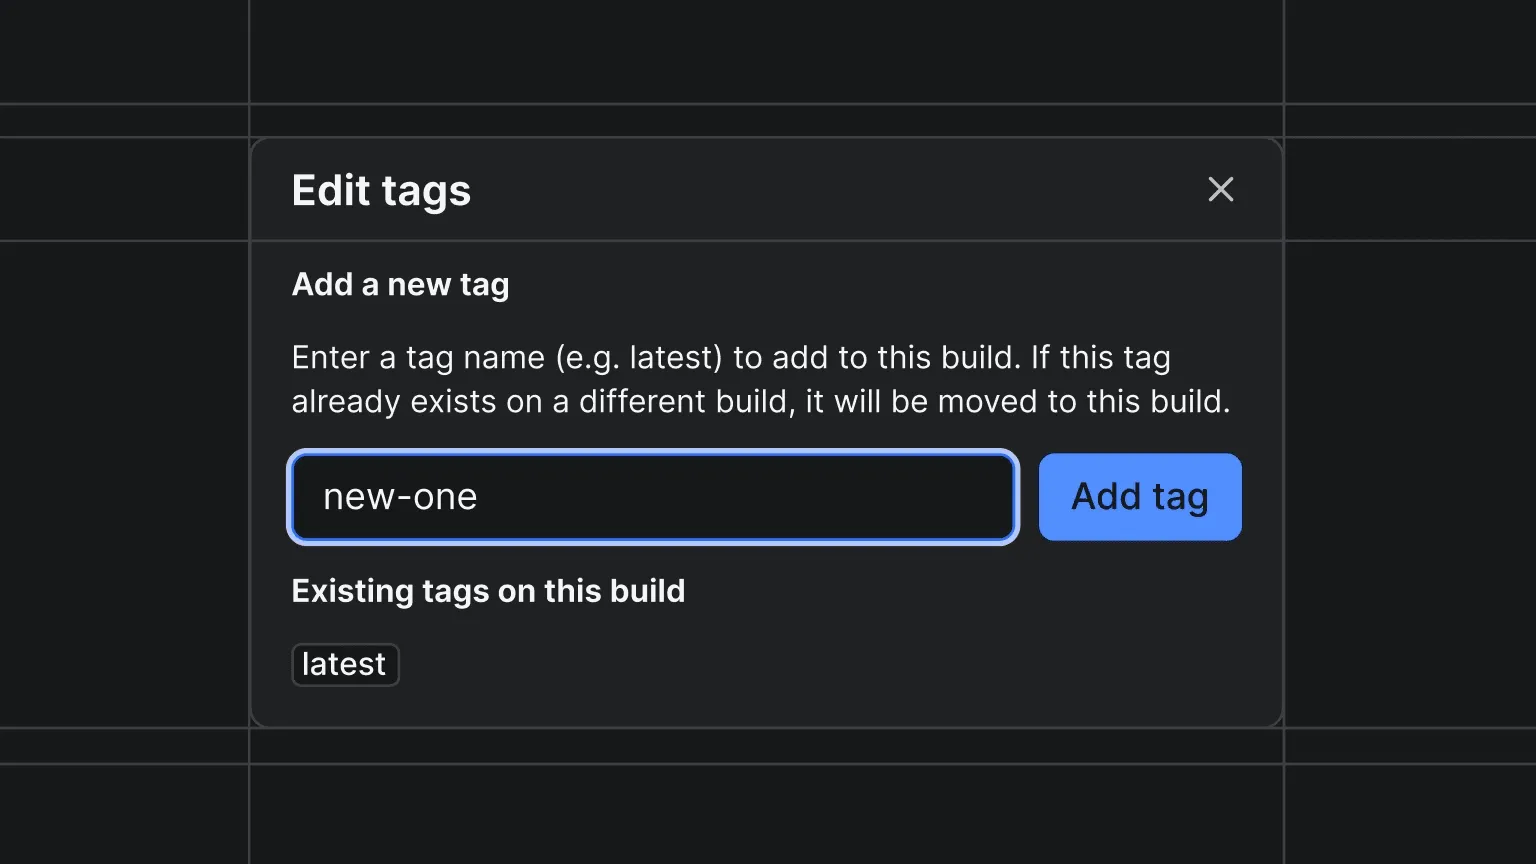
You can now add and remove build tags for your Actors directly in Apify Console. On any completed build's detail page, click the tag icon next to the build number to open the tag editor.
From the modal you can:
Add a tag - enter a tag name (e.g. latest, beta, stable) and assign it to the build. If the tag already exists on a different build, it will be moved to this one.
Remove a tag - delete any existing tag from the build.
This makes it easy to reassign tags like latest to a previous build for quick rollbacks without needing to rebuild. Build tags can also be managed programmatically via the API .
You can learn more about how builds and tags work in the docs .
mcpc is a new open-source CLI client for the MCP. It gives AI agents and developers a single, production-grade tool to authenticate, call tools, read resources, and manage sessions across any MCP server, all from the command line.
Instead of integrating MCP directly into your agent code, mcpc generates commands that your agent executes. This keeps tool execution sandboxed, reduces token overhead when working with many tools, and improves performance.
Key features
OAuth 2.1 + PKCE authentication out of the box, no custom auth code needed
Persistent sessions that survive between runs, so you don't re-authenticate every time
--json output mode for easy integration into scripts and automation pipelines
MCP proxy mode that exposes any stdio-based MCP server over HTTP
Full MCP support for all primitives: tools, resources, prompts, and sampling
Both transports supported: stdio and streamable HTTP
How it works
Connect to any MCP server using stdio or streamable HTTP transport
Authenticate automatically via OAuth 2.1 + PKCE when the server requires it
Discover available tools, resources, and prompts on the server
Execute commands and pipe results into your agent or CI/CD pipeline using --json
As an example, you can list all available tools on the Apify MCP server and call one in two commands:
Apify Agent Skills are reusable instruction sets that teach AI coding assistants like Claude Code and Cursor how to work with the Apify platform. Think of them as expert knowledge packaged for your AI pair programmer: instead of explaining Apify concepts from scratch every time, you install a skill and your assistant knows how to build Actors, pick the right scraping tool, and follow best practices.
apify-actor-development - Teaches your AI assistant how to build, debug, and deploy Apify Actors following best practices, including project structure, error handling, and platform conventions
apify-ultimate-scraper - Teaches your AI agent how to scrape any website at scale by selecting the right Actor for the job, configuring inputs, and handling common scraping challenges
Installation
Run a single command to add Apify skills to your project:
$npx skills add apify/agent-skills
Once installed, your AI assistant automatically picks up the skill instructions and applies them when relevant. No additional configuration is needed.
On April 1st, we are deprecating the legacy Server-Sent Events (SSE) transport for the Apify MCP server in favor of Streamable HTTP, the standard transport defined in the MCP specification .
Streamable HTTP is simpler, more reliable, and supported by all major MCP clients. The legacy SSE endpoint will stop working after the deprecation date.
What you need to do
Update your MCP client configuration to replace the old SSE endpoint with the new base URL:
Before:mcp.apify.com/sse
After:mcp.apify.com
No other changes are needed. All tools, resources, and authentication work the same way on the new endpoint.
Dynamic Actor memory is a new feature that lets Actor developers define an expression that automatically adjusts the memory allocation for a run based on its input and run options.
Instead of using a fixed memory value or requiring users to tune memory manually, this expression is evaluated for every run. This improves performance for large inputs, reduces costs for small ones, and requires less manual configuration from users.
How it works
Before a run is started, its memory is determined in this order
Run level override: If the user provides explicit memory when starting a run (via UI or API), it always takes precedence
Dynamic memory expression: If no run-level override is provided, the platform evaluates the dynamic memory expression defined in actor.json. The expression can use values from the input and run options to calculate memory.
Actor default memory: Used when no valid expression is defined or when its evaluation fails
Platform and user limits: The result is rounded to the nearest power of two and set to respect the minimum and maximum allowed memory set by the Actor developer, as well as platform and user limits
Expressions support arithmetic operations, math functions, conditionals (based on MathJS ), and safe property access with get().
As an example, let’s say an Actor accepts a list of URLs to scrape, and the developer would want to allocate 64 MB of memory for each URL, but never more than 4 GB. The expression could look like this:
min(get(input,'startUrls.length',1)*64,4096)
For more information on how to configure expressions for your Actors and how dynamic memory works, see the docs .
Actor schemas: Apify is introducing Actor schema support for across your entire data pipeline. Actor creators can now define and enforce schemas for Actor outputs, datasets, web server responses, and key-value stores.
The actor schemas will improve the validation of data structures, enabling the construction of more reliable workflows as well as ensuring quality results from each Actor.
Dataset schema: The dataset schema defines the structure and representation of the data produced by an Actor, both in the API and Apify Console.
Key-value store schema: The key‑value store schema organizes keys into logical groups called collections, which can be used to filter and categorize data both in the API and Apify Console. In addition, we have been iterating on our key-value store UI to achieve parity with our API. Integrators now have the ability to bulk-upload files, drag and drop, and key-value store collections to better organize the data that you export.
Output schema: The Actor output schema builds upon the schemas for the dataset and key-value store . It specifies where an Actor stores its output and defines templates for accessing that output.
Web server schema: The web server schema ensures that data returned by your Actor’s web server is formatted correctly, so integrations and apps that consume it work reliably.
Input sub-schemas let you break down and refine Actor inputs at a more granular level, so you can filter, exclude, or customize what data the Actor processes. This should make for better results with fewer runs.