
Open up a blank document in your favorite code editor, save it as a .html file to your computer, then load it in your browser.
Familiarize yourself with the developer tools of your browser:
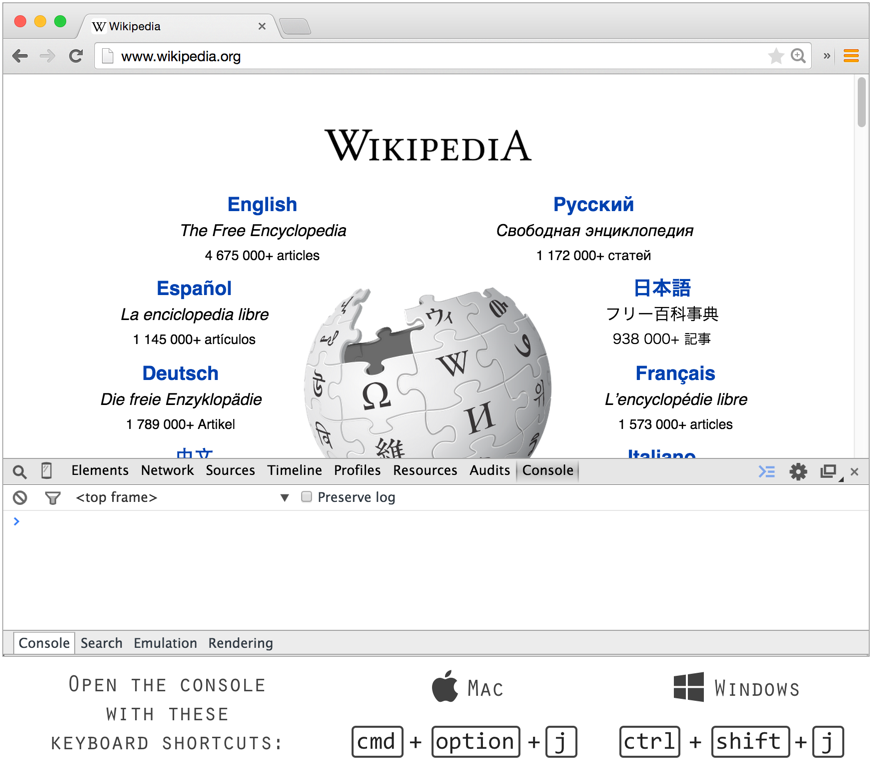
- Chrome: View: Developer: Developer Tools then look for the Console tab. (ref)
- Firefox: Tools: Web Developer: Web Console. (ref)
- Safari: Develop: Show Web Inspector then look for the Console tab. (Developer mode as to be enabled; ref)
- Internet Explorer users: download one of the above browsers and follow their instructions.
Like CSS, JavaScript is more code that gets incorporated into your HTML page.
JavaScript allows you to:
- Control the browser
- Communicate asynchronously (Ajax)
- Alter the page after the page has loaded
Quick Facts:
- JavaScript != Java
- The official name for JavaScript is ECMAScript
- JavaScript is most commonly used as a client-side script, but it also has server-side implementations.
- Essence: Manipulating CSS
- Fun/Interactive: Animations
- Practical: Menus
- Practical: Form validation
- Vogue with Konami - U-U-D-D-L-R-L-R-B-A-Enter
- Ajax: Fetch information live
In these latter examples two main things are happening:
- JavaScript is “listening” for user some user action, be it a mouse hover or a key being entered in an input.
- That action is triggering a reaction on the page, be it displaying new content, hiding content, or changing the style of existing content.
This simple action and reaction is the core of JavaScript, and it'll take your page to the next level from static content to a dynamic experience.
Just like CSS, there are three ways you can work JavaScript into your site: inline, internally or externally.
[Q] What are the different reasons we use inline, internal or external CSS? Those same reasons apply to how we choose to integrate JavaScript.
Inline JavaScript is frowned upon because it mixes too much logic with your HTML display code. Given that, we'll only demonstrate internal and external JavaScript.
Let's start with a simple example using internal JavaScript:
<!DOCTYPE html>
<head>
</head>

<body>
	<script>
		alert('Hello');
	</script>
</body>
</html>
Notes:
- The JS code is surround in a
<script>block - The JS code is placed before the closing
</body>tag - alert() is a built in JavaScript method
- Methods consist of the method name followed by parentheses, where you can pass paramaters to the method
- In this case the parameter is what the alert box should display:
'Hello' - All JS commands should finish with a semicolon.
One of your best friends when writing JavaScript is going to be a browser Console. Instructions for setting these up is at the beginning of these notes. Load your tool of choice and make sure it's on the console tab.
The Console is very useful and serves as a line of communication between you and the code allowing you to do the following:
- Display error messages your code generates
- Display debugging messages you program
- Directly execute lines of JS for testing purposes
Let's practice each of these.
Change your alert message to look exactly like this: alert('Hello'
When you run your code what do you see in the console?
Fix the code and run it again.
After your alert command, add this code:
console.log('Hello world!');
When you run your code what do you see in the console?
Before you move on to the next step, clear out the console.log and alert from your code so the next example will be clearer.
On the bottom of your Console is a line where you can enter JS commands and execute them one by one. This feature is really useful when testing specific bits of JS.
Try running the alert from your Console:
alert('Hello');
Lets see what else we can do...
Create a 50x50 div on your page with a 1px solid black border. Make sure your div has an ID so you'll be able to talk to it from JS. We're giving our div the ID lucy.
<!DOCTYPE html>
<head>
	<title>Class Practice</title>

	<style type='text/css'>
		#lucy {
			border:1px solid black;
			width:100px;
			height:100px;
		}
	</style>
</head>

<body>
	<div id='lucy'></div>
</body>
</html>
Run your page and then enter the following line of code into your console:
document.getElementById('lucy').style.width = '500px';
Now try this:
document.getElementById('lucy').style.backgroundColor = 'red';
What you see here is pretty essential to everything we do in JavaScript: we're causing some change to our page. Right now we're triggering it ourselves, but eventually we'll wire this change to button clicks, mouse hovers, etc.
Bear with us for right now on how exactly those lines are working, we'll get to it in a bit!
Before we go any further with JavaScript, let's introduce jQuery.
- jQuery is a JavaScript library.
- Open source, cross-browser, CSS3 compliant.
- JavaScript library is a
.jsfile that a team of developers have written. - When we use libraries it gives our JavaScript shortcuts and extra functionality.
- Other JavaScript libraries: MooTools, YUI, Scriptaculous.
- jQuery most commonly used library (over 65% of the 10,000 most visited websites on the internet).
- jQuery prevents you from having to frequently reinvent the wheel.
- jQuery gives you many shortcuts.
- jQuery does things smarter.
Consider the following example. Both pieces of code below have the same result - they will fade an element out. In the example on the left, we have to take care of all the intricacies that it takes to animate an element's opacity from 100 down to 0. On the right, all of that is packed into a jQuery function called fadeOut.
Plain JavaScript Way
var TimeToFade = 1000.0;

function fade(eid)
{
  var element = document.getElementById(eid);
  if(element == null)
    return;

  if(element.FadeState == null)
  {
    if(element.style.opacity == null
        || element.style.opacity == ''
        || element.style.opacity == '1')
    {
      element.FadeState = 2;
    }
    else
    {
      element.FadeState = -2;
    }
  }

  if(element.FadeState == 1 || element.FadeState == -1)
  {
    element.FadeState = element.FadeState == 1 ? -1 : 1;
    element.FadeTimeLeft = TimeToFade - element.FadeTimeLeft;
  }
  else
  {
    element.FadeState = element.FadeState == 2 ? -1 : 1;
    element.FadeTimeLeft = TimeToFade;
    setTimeout("animateFade(" + new Date().getTime() + ",'" + eid + "')", 33);
  }
}
JavaScript with jQuery
function fade(eid) {
   $('#' + eid).fadeOut('slow');
}
To start using jQuery you just need to include the jQuery .js file on your page.
You have two options for doing this:
- Download a copy of jQuery.com, upload it to your server and run it from there
- Run it from the Google Hosted Libraries
We're going to use Option #2 for this class, but what are some pros and cons you can think of for each method?
Whichever option you choose, you just need to use the script element to link in the jQuery file:
<script src="http://ajax.googleapis.com/ajax/libs/jquery/1.10.2/jquery.min.js"></script>
Place this right before your closing body tag.
Reload your page. If you don't see any errors, you're good to go!
With jQuery installed, let's try changing lucy again, but this time let's do it from our code instead of the console.
Here's our setup:
<!DOCTYPE html>
<head>
	<style>
		#lucy {
			border:1px solid black;
			width:100px;
			height:100px;
		}
	</style>
</head>

<body>
	<div id='lucy'></div>

	 <script src="http://ajax.googleapis.com/ajax/libs/jquery/1.10.2/jquery.min.js"></script>
	<script>
		document.getElementById('lucy').style.width = '500px';
		document.getElementById('lucy').style.backgroundColor = 'red';
	</script>
</body>
</html>
Let's break down how those two lucy-changing-lines work.
First, it's important to understand that an HTML page is built around the idea of a Document Object Model (DOM). The DOM is simply every element you see on your page. An image, a heading, a div, a paragraph of text, etc. --- all Objects in the DOM.
One way of interacting with the DOM is via a JavaScript method called getElementById, as we're seeing here:
document.getElementById('lucy').style.width = '500px';
This line says, go into your Document Object Model (document), and get the element with the id lucy. Once we have that element, we access its style and then its width which we set to 500px.
This line works, but we can make it better (shorter, more flexible) by taking advantage of jQuery.
Instead of writing it:
document.getElementById('lucy').style.width = '500px';
With jQuery we can simplify it to this:
$('#lucy').css('width', '500px');
That dollar sign represents the jQuery selector, and it is used instead of document.getElementById. JavaScript is all about targeting elements on your page and the $ method makes that super easy.
A pound sign says to select the element via the id of an element
$('#lucy').css('width', '500px');
A period says to select all the elements via the class of an element.
Add another div with id ricky and give both your divs lucy and ricky the class ricardo to test this out.
$('.ricardo').css('background-color', 'yellow');
Finally, we can just access elements via their HTML tag (no pound signs or periods):
$('body').css('background-color', 'yellow');
$('div').css('background-color', 'green');
In all of these examples we're using the jQuery method .css() (http://api.jquery.com/css/) which accepts two parameters:
- The style you're changing
- What you're changing the style to
Have a look around the documentation for the jQuery .css method. It will help you familiarize yourself with the jQuery documentation, which you'll be referring to often.
Write the following commands. As you successfully complete each one, comment out the line with two forward slashes before moving on to the next one.
Example:
//$(body).css('background-color','red');
$(body).css('background-color','green');
- Write a line that will make the lucy div have a 3px solid red border.
- Write a line that will make both the lucy and the ricky divs yellow (i.e the ricardo divs)
- Write a line that will turn the body of the page yellow
- Write a line that will turn all the divs on your page green
- Write a line that will make all the divs on your page disappear